One of the most important yet often overlooked aspects of miniature painting is learning how to properly thin your paints. Whether you are a beginner or an experienced painter, mastering this skill can significantly improve the quality of your work. Thinning your paints allows for smoother application, better color blending, and avoids obscuring the finer details of your miniatures. In this guide, we will explore why thinning your paints is essential, the different methods to achieve the perfect consistency, and tips to ensure you get the best results every time.
Understanding what thinning a paint actually is
Any acrylic paint is made up of two key components, the pigment which provides it with colour and allows it to cover the model’s surfaces, and the medium which allows it to flow nicely off the brush and once it dries creates a durable finish so the pigment doesn’t rub off the miniature. Thinning or diluting your paints typically can refer to two different things related to those properties:
- Thin vs thick paint: the most obvious one, thin paint is runnier and more watery, flows more easily off the brush and all over any surface, whereas thick paint is stickier and tends to form blobs or drops wherever you place it, leaving brush traces all over the place when you apply it and move it around the model’s surface. The key is to find the sweet spot between too thick (not good because it will leave an uneven result and may obscure details) and too thin (will run all over the place and not stick to the surfaces you want to paint). You can achieve this by carefully balancing the amount of paint and thinner or water in your mix.
- Transparent vs opaque paint: less obvious but still very important depending on the technique you want to attempt, transparent paints have less pigment in them and will show the layers underneath once you apply them to your model; whereas opaque paints cover really well and don’t really show anything that you may have painted under the area of application. You can control how transparent a paint is without thinning it too much by adding a transparent acrylic medium until you achieve the transparency you need.
Why Is It Important to Thin Your Paints?
Thinning your paints is crucial for several reasons:
- Preserves Detail: Many miniatures have intricate details that can easily be obscured by thick, unthinned paint. Thinning your paints ensures that these details remain sharp and visible.
- Smooth Application: Thin paints spread more evenly across the surface of the miniature, preventing streaks, brush marks, and clumping.
- Better Control: Thinned paint allows for more control, especially when working with layering or glazing techniques. It helps in achieving subtle transitions and blending colors effectively.
- Prevents Chalky Finish: Thick paint can dry with a chalky or uneven finish. Thinning helps in maintaining a smooth and consistent appearance.
How to Thin Your Paints: The Basics
Thinning your paints is a simple process, but it’s important to get the consistency just right. Here’s a basic guide:
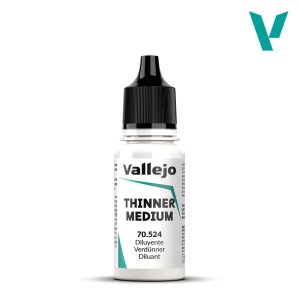
- Choose Your Thinner: The most common options for thinning paints are water, acrylic medium, or specialized paint thinners. Each has its benefits:
- Water: Readily available and easy to use, but can sometimes reduce the durability of the paint.
- Acrylic Medium: Specifically designed to maintain the paint’s integrity while thinning it. It’s ideal for preserving color intensity and finish.
- Specialized Thinners: These are designed by paint manufacturers and are perfect for achieving a consistent flow without altering the paint’s properties.
- Mixing Ratios: A good starting point is a 1:1 ratio of paint to thinner, but this can vary depending on the type of paint, the effect you’re aiming for, and the temperature and humidity of the room. Some techniques may require more thinning, like glazing or applying very thin layers.
- Test the Consistency: After mixing, test the paint on a piece of paper or a spare miniature. The paint should flow smoothly off the brush and create a thin, even coat. If it’s too thick, add more thinner; if it’s too runny, add a bit more paint until you find the consistency that works best for you.
Advanced Techniques for Thinning Paints
Once you’re comfortable with basic thinning, you can explore advanced techniques to further enhance your painting skills:
Glazing
Glazing involves applying very thin layers of paint to create a subtle tint or to smooth transitions between colors. To create a glaze, mix your paint with a large amount of thinner, typically a ratio of 1:4 (paint to thinner). This mixture should be almost transparent.
- Application: Apply the glaze in thin, even coats, allowing each layer to fully dry before applying the next. Glazing is perfect for adding depth to shadows or creating soft highlights.
Layering
Layering involves applying multiple thin layers of paint to build up color and create smooth transitions. This technique requires paint that is fairly thin, yet still provides good coverage.
- Thinning for Layering: The ideal consistency for layering is similar to milk. It should be slightly runny, but not too watery. A ratio of 2:1 (paint to thinner) usually works well.
Wet Blending
Wet blending is a technique where two or more colors are blended directly on the miniature while the paint is still wet. This requires paint that is thinned just enough to remain workable but not so much that it runs.
- Thinning for Wet Blending: Aim for a 1:1 ratio of paint to thinner. This consistency allows the paint to flow and blend smoothly without drying too quickly. If you are a beginner, it may be a good idea to use a retarder medium so the paint dries more slowly and you have more working time to achieve the desired result.
Common Mistakes When Thinning Paints (and How to Avoid Them)
Even seasoned painters can make mistakes when thinning their paints. Here are some common pitfalls and how to avoid them:
- Over-Thinning: If your paint becomes too watery, it can lose too much opacity and may require multiple coats to cover the surface. To avoid this, add thinner gradually and test the consistency often.
- Inconsistent Mixing: Failing to mix your paint thoroughly after adding thinner can result in an uneven application. Always ensure that the paint and thinner are mixed really well before you start painting.
- Using Tap Water: Depending on your location, tap water may contain impurities that affect paint performance. If that’s the case, you can use filtered water or a specialized thinner to ensure consistent results.
Tools and Products to Help You Thin Your Paints
To make the process easier, consider using these tools and products:
- Wet Palette: A wet palette helps keep your paint fresh and workable for longer periods, making it easier to maintain the right consistency during your painting sessions.
- Flow Improvers: These additives help improve the flow of paint, making it easier to apply without affecting coverage.
- Thinning Mediums: These additives reduce the coverage of paint, making it more transparent without affecting how it flows off your brush and into the miniature.
- Retarder Mediums: These slow down the drying time of your paints, allowing you to work on them for a longer time before they start setting on the model.
Conclusion
Learning how to thin your paints properly is a fundamental skill that will dramatically improve the quality of your miniature painting. Whether you’re just starting or looking to refine your technique, understanding the importance of thinning and mastering the various methods will lead to smoother, more professional-looking results. Remember, practice makes perfect, so don’t hesitate to experiment with different thinning ratios and techniques until you find what works best for you.